n8n + ngrok: Free Local Setup Guide
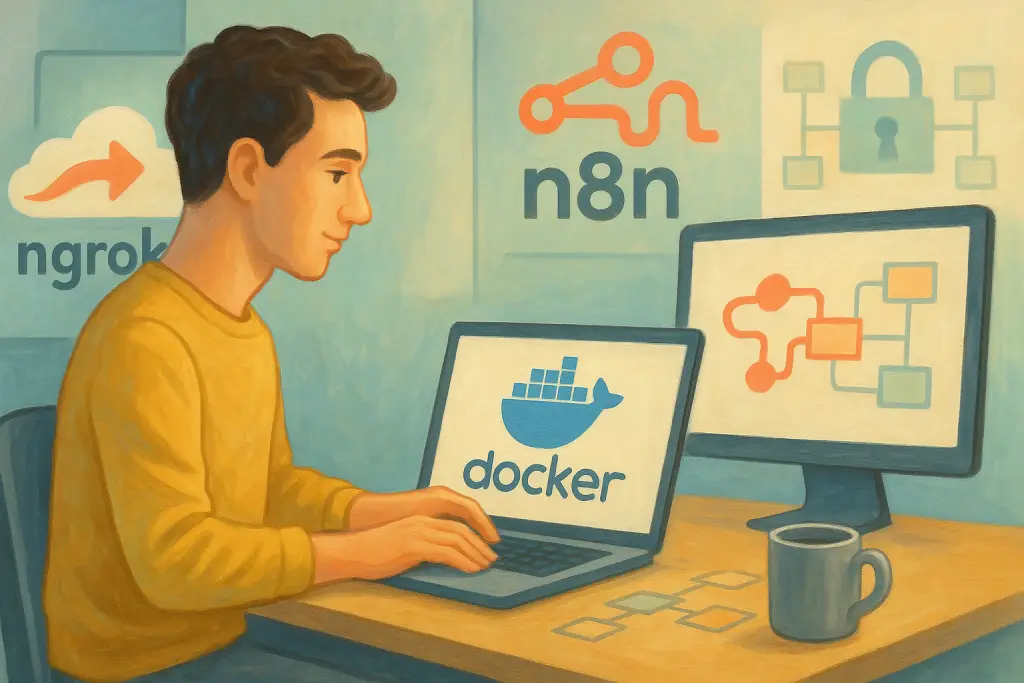

Table of Contents
- Introduction
- Understanding n8n and ngrok
- Prerequisites for the Setup
- Step-by-Step Guide
- Using Docker Compose for Automation
- Handling Dynamic URLs and Webhook Updates
- Troubleshooting Common Issues
- Security and Best Practices
- Conclusion
- Frequently Asked Questions (FAQs)
Introduction
In today's fast-paced digital world, automating repetitive tasks and connecting various services can save you a great deal of time. That's where n8n comes in. As an open source workflow automation tool, n8n allows you to connect multiple applications through a visual interface that is both intuitive and powerful. In this guide, we will focus on setting up n8n locally on your computer for free while exposing it to the internet using ngrok.
Why use a local setup? Running n8n on your own machine gives you complete control over your data and workflows. With Docker, you ensure a consistent environment regardless of your operating system, and with ngrok, you can bypass firewall restrictions to expose your local server safely to the public internet.
Whether you're a hobbyist just experimenting or a developer testing complex integrations, this guide will walk you through every step in a friendly and detailed manner, mixing clear instructions with handy tips along the way.
Note: If you prefer a managed solution without the complexity of self-hosting, you can also try n8n Cloud for a quick start.
Understanding n8n and ngrok
Before we dive into the installation details, it is important to grasp the key concepts behind the tools involved.
What is n8n?
n8n is an open source workflow automation tool that has grown popular among developers and non-developers alike. Think of it as a digital 'plumbing' system for your online services—connecting apps, databases, and APIs with a simple drag-and-drop interface. Some key aspects include:
- Open Source: You have complete visibility into its code and can modify it as per your needs.
- Extensibility: It supports custom nodes and integrates with hundreds of services.
- Flexibility: You can design complex workflows without programming knowledge.
- Data Security: Running locally means your data isn’t hosted on an external service.
What is ngrok?
ngrok is a tool that creates secure tunnels from your local development environment to a public URL on the internet. This is especially useful when you’re working along with webhooks or need remote access without deploying your entire application publically. Features of ngrok include:
- Secure Tunneling: Provides a secure HTTPS URL that exposes your local service.
- Dynamic URL: On the free plan, the URL changes with every start. While this means extra steps for webhook updates, it’s still a great option for testing.
- Ease of Use: Quick setup and straightforward configuration allow you to get started in minutes.
By combining n8n and ngrok, you can build and test sophisticated workflows from anywhere, all without incurring any cost.
Prerequisites for the Setup
Before starting the actual setup, make sure you have these essentials in place. This section will help you verify that you’re ready to go:
Hardware and Software Requirements
- A Computer: Whether you’re using Windows, macOS, or Linux, a modern PC with internet connectivity will work just fine.
- Internet Connection: ngrok needs internet access to create a secure tunnel.
- Command-Line Familiarity: Basic knowledge of command-line operations (Terminal, Command Prompt, or PowerShell) is all you really need.
Accounts and Tools
You must also create and install a few accounts and tools:
-
Docker:
Download and install Docker Desktop for Windows/macOS from the Docker website. Linux users can follow instructions from the Docker Engine Installation Documentation. -
ngrok:
Visit the ngrok download page and download the appropriate binary for your operating system. After downloading, remember to extract the binary and add it to your PATH if required. -
ngrok Account:
Sign up for a free account at ngrok.com to obtain your authtoken, which is needed for authentication. -
n8n:
We use the official n8n Docker image provided on Docker Hub.
Following these prerequisites ensures a smooth experience through the setup process.
Step-by-Step Guide
In this section, we’ll break down every step required to quickly get n8n up and running on your local machine, exposing it to the public internet using ngrok.
Installing Docker
Docker is the foundational component that enables running n8n in a contained environment. Follow these step-by-step instructions to set up Docker:
For Windows/macOS:
- Download Docker Desktop from the Docker website.
- Run the installer and follow on-screen instructions.
- Once installed, launch Docker Desktop, and let it initialize.
- Open your command prompt or Terminal, and run:
You should see a version string confirming the installation. For instance, "Docker version 20.xx.xx, build xxxx."docker --version
For Linux:
- Follow the instructions in the Docker Engine Installation Documentation.
- Once the installation completes, verify with:
docker --version
Docker provides containerized environments which help maintain consistency across different computers, making it easier to execute the exact same code irrespective of your operating system.
Installing and Configuring ngrok
Now that Docker is set up, let’s move on to ngrok. The ngrok tool is instrumental in creating a secure tunnel to your locally hosted n8n instance.
Steps to Install ngrok:
-
Download ngrok:
- Head over to the ngrok download page.
- Download the binary for your specific operating system.
-
Extract ngrok:
- On Windows, extract the
ngrok.exefile and place it in a familiar folder (for instance,C:\ngrok). - On macOS/Linux, extract the file via the command line:
Replace the filename as applicable to your OS.unzip ngrok-stable-darwin-amd64.zip mv ngrok /usr/local/bin
- On Windows, extract the
-
Verify Installation:
Open the Terminal (or Command Prompt) and run:ngrok --versionThis should output the version details of ngrok.
-
Configure ngrok with Your Authtoken:
- Sign in to your ngrok account.
- Copy the authtoken from the dashboard.
- Run the following command, replacing YOUR_AUTHTOKEN with the token you received:
ngrok config add-authtoken YOUR_AUTHTOKEN
This step links your ngrok installation to your account and unlocks additional features.
Setting Up n8n Locally
With Docker and ngrok ready, we can now focus on setting up n8n on your local machine.
Creating a Data Directory
To ensure that your workflows and configurations persist after stopping the Docker container, you need to set up a data directory.
-
Windows:
Open PowerShell and execute:mkdir C:\n8n_data -
macOS/Linux:
Run in Terminal:mkdir ~/n8n_data
This directory will store the data that n8n uses, preventing data loss when the container stops.
Running the n8n Docker Container
To run n8n, execute the following command in your Terminal (adjust based on your operating system):
-
For macOS/Linux:
docker run -it --rm --name n8n -p 5678:5678 -v ~/n8n_data:/home/node/.n8n n8nio/n8n -
For Windows (PowerShell):
docker run -it --rm --name n8n -p 5678:5678 -v C:\n8n_data:/home/node/.n8n n8nio/n8n
Explanation of flags:
- -it: Runs the container in interactive mode.
- --rm: Automatically removes the container when it stops.
- --name n8n: Gives the container an identifiable name.
- -p 5678:5678: Maps the container's port 5678 to your local machine.
- -v: Binds your local data directory to the container’s folder ensuring persistence.
- n8nio/n8n: Specifies the Docker image to run.
Once executed, you can confirm n8n is running by navigating to:
http://localhost:5678
This URL should display the n8n interface, ready for you to begin creating workflows.
Exposing n8n to the Internet
At this point, n8n is running locally. However, it isn’t accessible from outside your network. This is where ngrok comes in.
Starting ngrok Tunnel
- Open a new Terminal window.
- Run the following command to create a tunnel on port 5678:
ngrok http 5678
You will see output similar to the following:
Session Status                online
Account                       Your Name (Plan: Free)
Version                       2.X.X
Region                        United States (us)
Web Interface                 http://127.0.0.1:4040
Forwarding                    http://abc123.ngrok.io -> http://localhost:5678
Forwarding                    https://abc123.ngrok.io -> http://localhost:5678
The URL displayed under “Forwarding” (e.g., https://abc123.ngrok.io) is now your public URL that redirects to your local n8n instance. Keep this Terminal window open—if you close it, the tunnel shuts down.
Configuring n8n to Use the ngrok URL
n8n needs to know its public URL to create valid webhook endpoints. To configure n8n with your ngrok URL, you must restart the n8n Docker container with an additional environment variable.
- Stop the currently running n8n container (if necessary) by pressing Ctrl+C in the Terminal window where it’s running.
- Restart the container with the
WEBHOOK_URLenvironment variable:- For macOS/Linux:
docker run -it --rm --name n8n -p 5678:5678 -v ~/n8n_data:/home/node/.n8n -e WEBHOOK_URL=https://abc123.ngrok.io n8nio/n8n - For Windows:
docker run -it --rm --name n8n -p 5678:5678 -v C:\n8n_data:/home/node/.n8n -e WEBHOOK_URL=https://abc123.ngrok.io n8nio/n8n
https://abc123.ngrok.iowith your actual ngrok URL. - For macOS/Linux:
This ensures that when you create webhook nodes in n8n, they use the public ngrok URL so that external services can trigger these webhooks properly.
Using Docker Compose for Automation
While the manual commands are useful to understand the basics, using Docker Compose can streamline the entire process. With Docker Compose, you define a multi-container setup in a single YAML file that orchestrates the services.
Steps to Use Docker Compose:
-
Clone the Repository:
You can use a community-maintained repository as a starting point. For instance, Joffcom/n8n-ngrok found on GitHub is a good option:git clone https://github.com/Joffcom/n8n-ngrok.git cd n8n-ngrok -
Create a .env File:
Inside the cloned repository, create a.envfile and include your ngrok authtoken:NGROK_TOKEN=your_ngrok_tokenReplace
your_ngrok_tokenwith the actual token from your ngrok account. -
Edit the Docker Compose File:
Ensure the configuration file (typicallydocker-compose.yml) matches your settings. The configuration might look similar to this:version: "3.7" services: n8n: image: n8nio/n8n ports: - "5678:5678" environment: - WEBHOOK_URL=${NGROK_URL} volumes: - ./n8n_data:/home/node/.n8n ngrok: image: wernight/ngrok command: http n8n:5678 environment: - NGROK_AUTH=${NGROK_TOKEN} - NGROK_REGION=usIf needed, adjust according to your personal requirements.
-
Bring Up the Services:
Run the following command from the repository directory:docker-compose upThis command starts both the n8n and ngrok services. Check the logs for the public URL assigned by ngrok.
Using Docker Compose makes it easier to manage and restart your setup without running multiple commands manually.
Handling Dynamic URLs and Webhook Updates
One challenge with ngrok's free plan is that the public URL changes every time you restart it. This dynamic nature means that:
- If you’re using webhooks that have been configured with an old URL, they won’t trigger correctly.
- You must update the
WEBHOOK_URLenvironment variable in your n8n container instance each time you get a new ngrok URL.
Strategies to Manage Dynamic URLs:
-
Manual Update:
Each time you restart ngrok, note the new URL from the Terminal output, then update your n8n startup command accordingly. Though a bit tedious, it’s a simple solution for testing purposes. -
Automated Scripts:
Consider writing a small script that:- Launches ngrok.
- Parses the output for the new forwarding URL.
- Restarts the n8n container with the new URL.
This could be implemented in Bash or PowerShell depending on your operating system.
-
Web Interface:
ngrok provides a web interface typically athttp://127.0.0.1:4040. You can visit this page to quickly find the forwarding URL without scrolling through Terminal output.
Quick Comparison Table
| Strategy | Pros | Cons |
|---|---|---|
| Manual Update | Simple and requires minimal setup | Tedious if restarted frequently |
| Automated Scripts | Saves time and reduces errors | Requires extra scripting efforts |
| Web Interface | Quick reference | Still manual in terms of integration |
By understanding these trade-offs, you can decide which method works best for your workflow. For casual testing, manual updates might suffice. For production or regular testing environments, an automated solution is recommended.
Troubleshooting Common Issues
Even with thorough instructions, issues may crop up. Here are some common problems and their fixes:
Docker Container Issues
-
Problem: Docker container won’t start.
- Solution: Ensure that Docker is running on your machine. If using Docker Desktop, check the system tray icon. Also, verify that the command you’re using points to the correct paths for data volumes.
-
Problem: Container starts but you can’t access n8n.
- Solution: Confirm that the port mapping is correct (i.e., port 5678 is not being used by another application). Verify your firewall settings to ensure incoming connections on the mapped port are allowed.
ngrok Connectivity Issues
-
Problem: ngrok does not generate a public URL.
- Solution: Double-check that you have correctly added your authtoken. Run
ngrok config add-authtoken YOUR_AUTHTOKENand restart ngrok. Make sure no local firewalls or network policies block outgoing connections to ngrok servers.
- Solution: Double-check that you have correctly added your authtoken. Run
-
Problem: Webhook requests do not reach n8n.
- Solution: Ensure the URLs in n8n reflect the current ngrok URL. Use the ngrok web interface (
http://127.0.0.1:4040) to inspect incoming requests and troubleshoot further.
- Solution: Ensure the URLs in n8n reflect the current ngrok URL. Use the ngrok web interface (
Data Persistence Issues
- Problem: n8n workflows disappear after restarting the container.
- Solution: Verify that you have correctly mounted the persistent volume using the
-vflag (e.g.,-v ~/n8n_data:/home/node/.n8n). The data directory must be writable and not deleted between container restarts.
- Solution: Verify that you have correctly mounted the persistent volume using the
Security and Best Practices
While running n8n locally with ngrok is great for testing and learning, a few security best practices should be observed:
-
Limited Exposure:
Only run your ngrok tunnel when needed. Shut it down when not in use to avoid unwanted access. -
Access Control:
If you plan to expose n8n for longer periods, consider using authentication mechanisms (n8n itself supports authentication for production setups). -
Regular Updates:
Keep both Docker images and ngrok updated. This ensures you benefit from security patches and improvements. Check the official n8n release notes and ngrok documentation regularly. -
Network Firewall:
Use a local firewall or set up rules to restrict access to your machine, especially on ports that are not meant to be public. -
Environment Variables:
Make sure sensitive tokens (like your ngrok authtoken) are not pushed to public repositories. Use environment files or secret managers to handle sensitive data.
Following these practices helps maintain a secure development environment while still enjoying the flexibility of a local setup.
Conclusion
Setting up n8n locally and exposing it to the internet using ngrok is a fantastic way to harness the power of automation. Throughout this guide, we have walked through every step—from installing Docker, configuring ngrok, and launching n8n, right through to managing dynamic URLs and troubleshooting common issues.
This guide was designed to be approachable even if you are new to Docker or workflow automation. I trust that the detailed instructions, tables, lists, and code snippets have made the process clear and manageable. The combination of n8n’s open-source capabilities with the flexibility of ngrok lets you experiment freely with complex workflows in a secure environment. And while the free plan comes with minor trade-offs (like dynamic URLs), they are easily managed with a bit of patience and routine updates.
For those who want to explore further, consider integrating automated scripts to handle URL updates or even setting up a more robust production environment with authentication and static URLs offered by paid plans. Remember, the key is to build a setup that resonates with your workflow and testing needs.
Whether you’re a developer testing API integrations or a non-technical user trying to automate your routine tasks, n8n powered by Docker and ngrok offers a powerful and cost-free solution to bring your ideas to life.
Helpful resources to keep handy:
Feel free to bookmark this guide as a reference whenever you need to quickly set up or troubleshoot your local n8n workflow platform.
By following this detailed guide, you should now have a clear understanding of how to set up the n8n workflow platform locally using Docker and safely expose it to the internet with ngrok. The process may seem intricate initially, but with a little patience, you’ll soon be automating tasks like a pro. Enjoy exploring the endless possibilities with n8n and keep experimenting with different workflows—the only limit is your imagination!
Frequently asked questions
Quick answers on the topics covered in this article.
When ngrok restarts on the free plan, it assigns a new public URL. You need to update the WEBHOOK_URL environment variable in your Docker command or in Docker Compose configurations. Some users write small scripts to automatically restart n8n with the new URL to keep their workflows running smoothly.